Thursday 6 March 2014

Larry's Hands

I decided to use the single wire method to make the armatures for Larry's hands. Less connection points in the hand mean there are less opportunities for the fingers to break.


The lovely George Carman (blog here) gave me a great bit of advice. When you want to sculpt two things exactly the same its best to work on both pieces at the same time. That way you can roll out the same size bits of sculpt and apply them to the armatures at the same time.


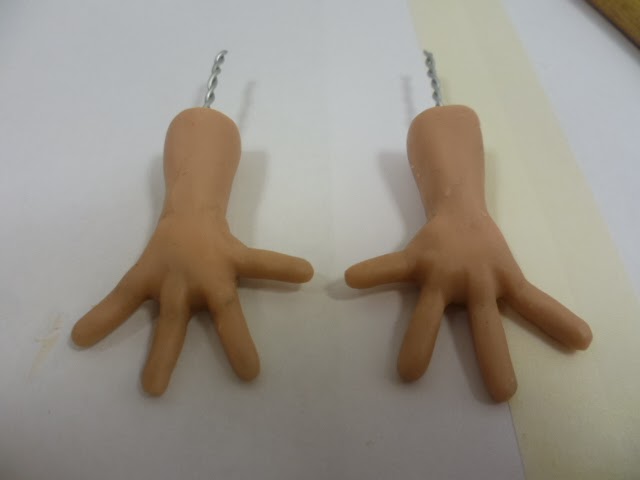
I had originally planned for Larry to have five fingers. After mushing several hands in frustration I decided to remove one finger to make sculpting them a bit easier.


Larry's hands laid up in Plasticine ready for pouring the first half of of the mold. See below/


Larry Boot(s)


 I decide, due to the amount of detail on Larry's boots to sculpt just one then pour the mold twice to get two identical boots.


 The detail in came out in the cast quite well. Though once again I had to destroy the original boot sculpt to retrieve the armature.

Padding out Larry Body

 I used balsa wood to block block out the chest and hips. I missed taking a few photos but I also carved out a slot for the armature to sit inside the balsa wood.


 I trimmed some soft foam to fit the tummy of the puppet.


Looking at some of the puppets the third years are making, I noticed they had added K&S rigging points to the ball and socket armature. I decided to use the existing rigging point in the hip of the armature rather than glue K&S to my puppet. I might add a K&S rigging point to the chest of the puppet because I get the feeling it will be top heavy and will need the extra support.

Sasquatch Hands

 Sculpted Sasquatch hands from super sculpy. Due to their tiny size these were possibly the most fiddly hands I've ever made.


Laying the sculpted hands up in Plasticine ready to pour the first half of the plaster.


Laying up the first half of the mold ready to pour the second half of the plaster.


 Both halves of the two part hand cast prior to cleaning up. I should have put the hand sculpts into the fridge/freezer before laying them up. This would have helped me to get a smoother finish around the edge of the hands. 

 I wrapped some thread around the hand armatures to help the silicon stick better.


 I painted some silicon into the mold this helps eliminate bubbles later on and ensures the armature doesn't show through the silicon. Once the painted layer was dry I added the armature, poured in more silicon and clamped both halves together, Unfortunately I didn't get any photos of that part.


Sasquatch Feet Continued

 I added some toenail detail to the feet in the above photo have begun to lay them up to make a one part plaster mold.


I lost some of the detail between the toes, I was quite sad that I had to destroy the sculpy feet to get the armatures back but other than that they turned out very well.


Starting to paint some silicon into the cast, this helps the eliminate air bubbles on the surface later on. I pushed some K&S into the holes to stop the silicon leaking out. I let this dry over night.


I added some soft foam to pad out the joints to help with movement later on.


 I poured in the rest of the silicon and pushed in the armature. The plasticine you can see under the mold is creating some space because the K&S poked out on the underside and meant the mold would not sit flat.