PROPS
Apologies for the lack of photos showing the making process. Things got a little bit crazy at this point and I didn't have time to document every thing. I was also nearly always covered in glue so I couldn't always grab my camera.
ARMCHAIR
I started with a core of what I think was packing foam and gradually cut and sanded it into shape. I then covered it in some faux leather fabric. At this point I found that the UHU glue caused a reaction with the foam and melted it. I ended up using PVA glue instead because it was the only thing I had to hand. This meant it took several days to dry.
After the PVA had dried I uses sandpaper and a dremel to rough up the leather a bit to make the armchair look old and worn.
DOOR
To make the door I started with lots of balsa wood. I managed to get a huge pack of balsa wood from Model Zone for about ten pounds. The door was designed so that I could slot it in and out of the wall of my set (An idea I borrowed from Saeed link to blog here). Both sides are different, the one above is for the interior room shots. The other side is for exterior shots.
The handle was made from a button and then pinned on with panel pins. This was so I could remove it to use on the other side of the door.
The door hinges I got from B&Q. I had some problems fitting these, because they don't fold flat it took me several attempts to fit them. The nail heads are for decoration only and the hinges are actually just glued to the balsa wood.
STOVE
The wood burning stove is made from mount board which I very carefully cut and glued together. I painted it black and added some rust detail to make it look old.
BOOKSHELF
More balsa wood and some paint to make it look textured. I also made a whole load of books to go with this.
PLANT
I salvaged some plastic plant parts from the model making room and made a little cardboard pot for it to go in.
MOOSE
This guy has got to be one of my favorite props. Amy (link to blog here) introduced me to the wonderful art of needle felting. I started with a soft foam core that i roughly shaped then using wool felted on top.
The finished moose. I used wool and wire to create the antlers and used a little acrylic paint to give the nostrealls more depth.
DEER
The deer was made in the exact same way as the moose. I was a little worried that it looked like a cow until I put the antlers on.
TABLE
More balsa wood and acrylic paint!
CAMERA
This was a fun little prop to make. I started with a core of balsa wood wrapped in a layer of faux leather. The gold edging is from a tomato puree tube that I carefully flattened and folded. The lens is a washer and a pen lid and the flash is a LED bulb.
BAGS

I made both bags at the same time, I dyed some cream linen with paint then then used my trusty sewing machine to put them together. I stuffed them with wadding and added suede for detail. They didn't need to be pretty or neat they were just space fillers for the set.
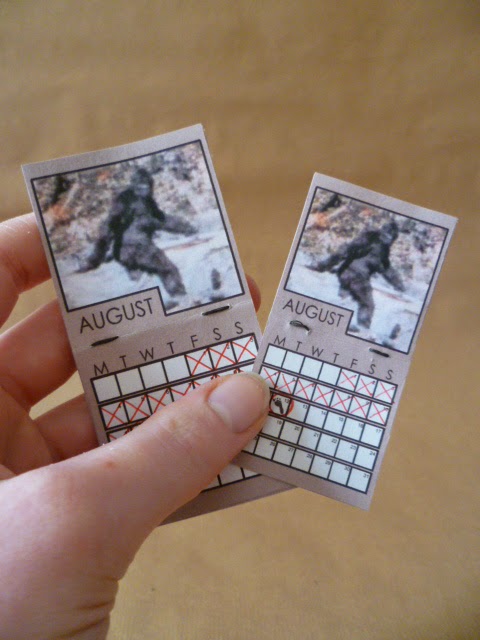
CALANDERS
FIRE POKERS
These were a bit of fun to make. I used a pair of pliers and a lot of elbow grease to flatten some aluminium wire then carefully twisted them to make the detail. I used acrylic to age them a little.


