Friday, 7 November 2014

After Effects and Mime Anmation Project


The last six weeks seem to have flown by and in that time I've managed make a significant scratch in the surface of all there is to know about Adobe After Effects.

Ive uploaded both unedited and edited versions of my final mime animation to Vimeo (links below) so you can see the start and end product.

My thanks go to Jason Evans (link to blog here) and Dan Harvey (link to blog here) for the end credits card on the final video and assisting with the music choice.


https://vimeo.com/111205843

https://vimeo.com/111205842


Monday, 27 October 2014

Finished Hive


This is the finished hive on my set about half way though filming.
Un-edited Mime animation coming soon. 

Sadly I will not be able to post my test footage which shows all of the progress and development for this project because the new computer I'm working on wiped all my tests from Stop Motion Pro. *angrily shakes fist at computer*
(Learn from my mistake guys, save as you work!)


Friday, 17 October 2014

Bee Hive Build


I started by cutting twenty trapeziums from balsa wood.


Next I used superglue to stick everything together, and gave each section a coat of white paint.


After stacking the sections I noticed they were a bit wobbly so I cut some wedges to make sure everything was snug and level before gluing it all together.


 In the next photo I have added legs and the top section for the roof to sit on.


I drilled a shallow hole into each of the legs to hold tiny magnets. This should stop the beehive moving when I film.


I used textured brown card to cover some balsa wood for the roof. Before gluing the roof down I added a second coat of white paint and then gave it a used look by staining certain areas with coffee.
(Finished prop photo coming soon) 

Tuesday, 14 October 2014

After Effects Project

For this project we have to create a 10 - 15 second animated performance of one character using mime to convey emotion I must also include a small amount of lip-sync. After completing the performance I will use after effects, flash and Photoshop to add visual effects to the performance.

Below is the storyboard of my second idea (my first idea involved guns and an explosion, how unoriginal is that!? *yawn*) 

I have lovingly named my mime sequence 'Save The Bees'


Thursday, 3 July 2014

Summer Time

Over the summer I wanted play with my armature, practice a bit of animation and re-do my walk, push, pull and throw cycles. Sadly this meant dismantling Larry, here he is waving goodbye...so sad. (I'm keeping all his parts so a can build a custom wire armature for him later)


And now say hello to my naked re-assembled slightly sassy looking H1 Pro armature. I found it difficult to animate and position it in this 'naked' form so I decided to bulk out the hips and chest with balsa wood.


 Here are the hip and chest blocks. I used a Dremel to do most of the shaping so getting to this stage didn't take too long.


I then stained and varnished both parts to make them more durable.


 Here is the finished product, complete with head and hands. Time to start animating.


Saturday, 14 June 2014

End of year two

Its been a little while since posted last, I wanted to give a little update.
 
I was lucky enough to be nominated for the Best Stop Motion category in the Glammies this year, it was a huge surprise and although I didn't win I was immensely proud to see my work up on the big screen next to my other nominees James Carlisle, Sean Gregory and George Carman.

I'm a little sad to see all the third years go, they've been a huge inspiration to me and I wish them all the best for the future.

I aim to improve my animation over the summer so I plan to re shoot my walk, push and lift cycles so keep an eye out for some new videos.

Last but not least here's my second year short film 'Out Of Focus'.

Friday, 9 May 2014

Interiour Set

      I finished filming yesterday so I figured it was finally time for an update. My dad helped me out with putting together the walls and floor of the set. We designed it so that the side walls could be quickly removed to allow me to get different angles for filming and to make animating easier.

The photos below show the set and props before I dirtied it up a little. I was a little concerned at how 'clean' it all looked until I spoke to James Carlisle (link to blog) about how to make the room look lived in and used.

I had intended to use magnets to hold down my puppets but I discovered that they weren't really strong enough. Once again my dad came to the rescue and added some legs to my set so I could use tie downs. Tie downs are great!


Props

PROPS

Apologies for the lack of photos showing the making process. Things got a little bit crazy at this point and I didn't have time to document every thing. I was also nearly always covered in glue so I couldn't always grab my camera.
ARMCHAIR

I started with a core of what I think was packing foam and gradually cut and sanded it into shape. I then covered it in some faux leather fabric. At this point I found that the UHU glue caused a reaction with the foam and melted it. I ended up using PVA glue instead because it was the only thing I had to hand. This meant it took several days to dry.

 After the PVA had dried I uses sandpaper and a dremel to rough up the leather a bit to make the armchair look old and worn.


DOOR


To make the door I started with lots of balsa wood. I managed to get a huge pack of balsa wood from Model Zone for about ten pounds. The door was designed so that I could slot it in and out of the wall of my set (An idea I borrowed from Saeed link to blog here). Both sides are different, the one above is for the interior room shots. The other side is for exterior shots.


The handle was made from a button and then pinned on with panel pins. This was so I could remove it to use on the other side of the door.

 The door hinges I got from B&Q. I had some problems fitting these, because they don't fold flat it took me several attempts to fit them. The nail heads are for decoration only and the hinges are actually just glued to the balsa wood.


STOVE

 The wood burning stove is made from mount board which I very carefully cut and glued together. I painted it black and added some rust detail to make it look old.


BOOKSHELF

 More balsa wood and some paint to make it look textured. I also made a whole load of books to go with this.

PLANT


I salvaged some plastic plant parts from the model making room and made a little cardboard pot for it to go in.


MOOSE


This guy has got to be one of my favorite props. Amy (link to blog here) introduced me to the wonderful art of needle felting. I started with a soft foam core that i roughly shaped then using wool felted on top.


The finished moose. I used wool and wire to create the antlers and used a little acrylic paint to give the nostrealls more depth.

DEER


The deer was made in the exact same way as the moose. I was a little worried that it looked like a cow until I put the antlers on.


TABLE


More balsa wood and acrylic paint!

CAMERA


This was a fun little prop to make. I started with a core of balsa wood wrapped in a layer of faux leather. The gold edging is from a tomato puree tube that I carefully flattened and folded. The lens is a washer and a pen lid and the flash is a LED bulb.

BAGS


I made both bags at the same time, I dyed some cream linen with paint then then used my trusty sewing machine to put them together. I stuffed them with wadding and added suede for detail. They didn't need to be pretty or neat they were just space fillers for the set.


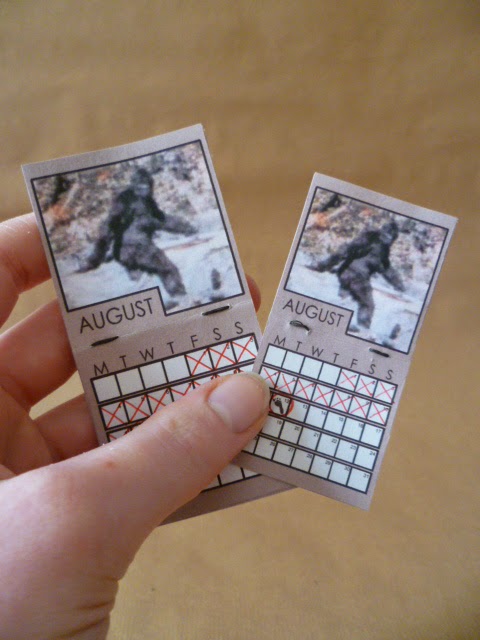
CALANDERS


FIRE POKERS


These were a bit of fun to make. I used a pair of pliers and a lot of elbow grease to flatten some aluminium wire then carefully twisted them to make the detail. I used acrylic to age them a little.


Tuesday, 1 April 2014

Faces

My plan for the faces had been to make internal sockets for the eye balls and to place a Milliput and Sculpy mask on top. I had several problems with this method so I had to quickly come up with an alternate option.

I sculpted each head/face from balsa wood and used Sculpy to add some features. I then used a Dremel to create sockets for the eyes (The eyes/beads will be held in with tacky wax/Dax wax).


Larrys Clothes

 I always find trousers the hardest to make so I started with those. I began by covering  the legs in a layer of clingfilm and masking tape.


 I marked out and labeled the different sections of the jeans. I then used theses as my templates to mark and cut the fabric.


I have a sewing machine so assembling them should have taken me all of a few minutes. Unfortunately due to some technical difficulties it look more like three hours.  After exhausting the entire troubleshooting page of the sewing machine guide book a quick call to my wonderful Aunt solved the problem. It turns out the thread I was using was too thick.

I added some details, pockets and belt loops. I'll add a nicer belt later on I was just using a strip of felt to prevent the loops sticking to the trousers.


 I used the same process to make a template for the shirt.


The sleeves are simply tucked into the main body of the shirt. This makes it easier to dress him and allows easy access to the bolts if they need tightening. Now to make a bomber jacket.


Little Problems

  
Im sure you can see in the above photo that the shins look incredibly short. It turns out I sculpted the boots a bit larger than intended. This was easily fixed by simply unscrewing the shin section of each leg and replacing it with a longer piece.

 I had to cut into the boot to unscrew the bolt, I was concerned that the cut would show but its hardly visible.
Unfortunatly the threaded bar holding both legs the the hip block worked loose, meaning the legs would move in unison. Luckily a bit of thread lock and epoxy fixed this.

So Much Silicon

I'd like to apologize for the long delay in posting. I've been very busy and now it seem like I have a million photos to scroll through and post. I've decided to keep most of my work under wraps for now. I wont be posting pictures of the completed puppets until after the deadline.


 Both of Larrys boots cast. I've dirtied the one on the right up a bit to bring out the Lace detail.

 This was my first hand cast for the Sasquatch. I didn't add enough silicon so they came out looking squished. My second attempt was much more successful.


 Larrys Hands

Sasquatch Feet